

How To Repair Shower Cartridge
Introduction
A leak in the shower could be a very frustrating situation in the household. Each time h2o drips from the faucet it ways that your money is falling out of your pocket slowly. If y'all are handy then you can save money, but if you are non handy so hiring a plumber tin exist a very expensive service. The purpose for this project is to help people learn how to fix a leaking shower/tub faucet on their ain without hiring an expensive plumber and save your pennies.
-
-
Turn off the main water valve to your house and turn on the water in the bathtub and wait for the remaining water to drain.
-
-
-
Turn the shower lever to the "On" position then that you can admission the spiral; remove the screw with an Allen wrench and the shower handle.
-
If you oasis't conducted this repair in the past, ensure that you take pictures during the disassembly for the reassembly.
-
-
-
Take a Phillips caput screwdriver to remove the handle adaptor and set it off to the side exactly how it was configured when it was attached.
-
-
-
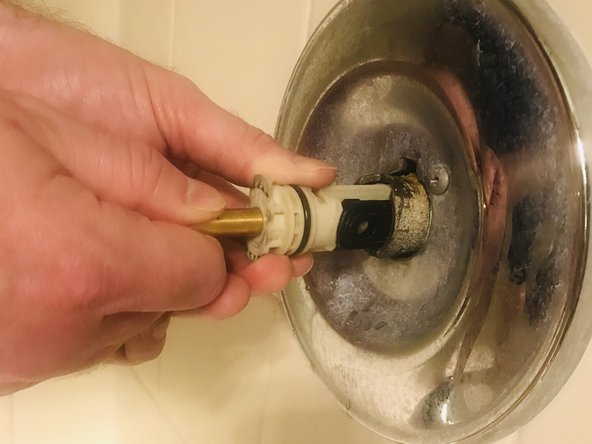
Pull off the collar to expose the valve cartridge that needs to be replaced.
-
-
-
Remove the clip (looks similar to a cotter pin) by pulling it straight up; may utilize a flathead screwdriver to assist with removing it, merely be careful not to lose any parts.
-
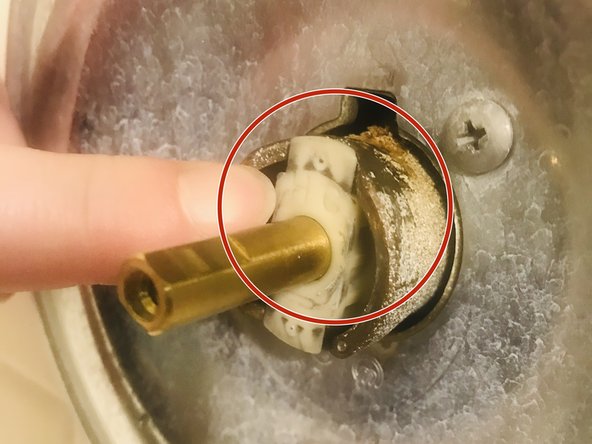
Ensure that you comment which side the Hot and Cold vest; there is an "H/C" marker on the cartridge cover; ensure that when you supersede it with the new cartridge that it's facing the same mode as the old cartridge.
-
-
-
Use the Posi-Temp Puller to remove the cartridge from the shower; you'll need to screw information technology in identify, then manually pull the cartridge out of the shower socket using a slow/controlled slightly twisting movement.
-
-
-
Once the valve comes out, you may experience some water coming from the shower socket opening; inspect the socket opening for any debris (rubber, slime, etc) that might exist left behind after removing the cartridge.
-
-
-
At present take the new cartridge and start pushing the cartridge encompass where "H/C" is annotated into the socket opening with the "H/C" oriented as the previous cartridge.
-
If the cartridge does non go all the way in to the aforementioned stop location, utilise the tool that came with the new cartridge to assist with pushing it in on the comprehend; this will ensure that y'all do not damage the new cartridge during installation.
-
-
-
Side by side take the prune (the clip that looks like a cotter pin) and reinstall it all the way or the neckband won't go back on; ensure that information technology'due south completely installed. You may have to adjust it so that it sits correctly.
-
Next, return the other pieces in reverse from when you took it autonomously; the neckband starting time, then the handle adapter, then the handle.
-
-
-
Replace the other pieces in opposite order; the neckband first, then the handle adapter, then the handle.
-
Turn the principal water back on, test the functionality of the valve by turning on the water at the shower; if the water comes out cold then to hot in the correct rotation, then you've successfully repaired your shower cartridge; if not, and then you may have to contrary the orientation of the cartridge and repeat the steps to ensure proper functionality.
-


Conclusion
To reassemble your device, follow these instructions in reverse society.
Embed this guide
Cull a size and copy the lawmaking beneath to embed this guide as a small widget on your site / forum.
Preview

How To Repair Shower Cartridge,
Source: https://www.ifixit.com/Guide/Shower+Valve+Cartridge+Replacement/131937
Posted by: rockwellfook1949.blogspot.com
0 Response to "How To Repair Shower Cartridge"
Post a Comment